We are the leader in mobile location science. Our innovations have been awarded 16 patents, and we continue to shape the future of the industry. Welcome to the forefront of advertising technology and advanced analytics.
Gen3 is Now Live
This upgrade promises faster processing speeds, more comprehensive reporting capabilities, and an improved visual interface, including all the latest tools and campaign options.
As the only 100% cookie-free IP Targeting solution, we view IP addresses as a way to connect businesses and marketers to their current and prospective customers more effectively than ever. We match physical addresses to IP addresses with extreme precision to increase the accuracy of your reach and the effectiveness of your penetration.
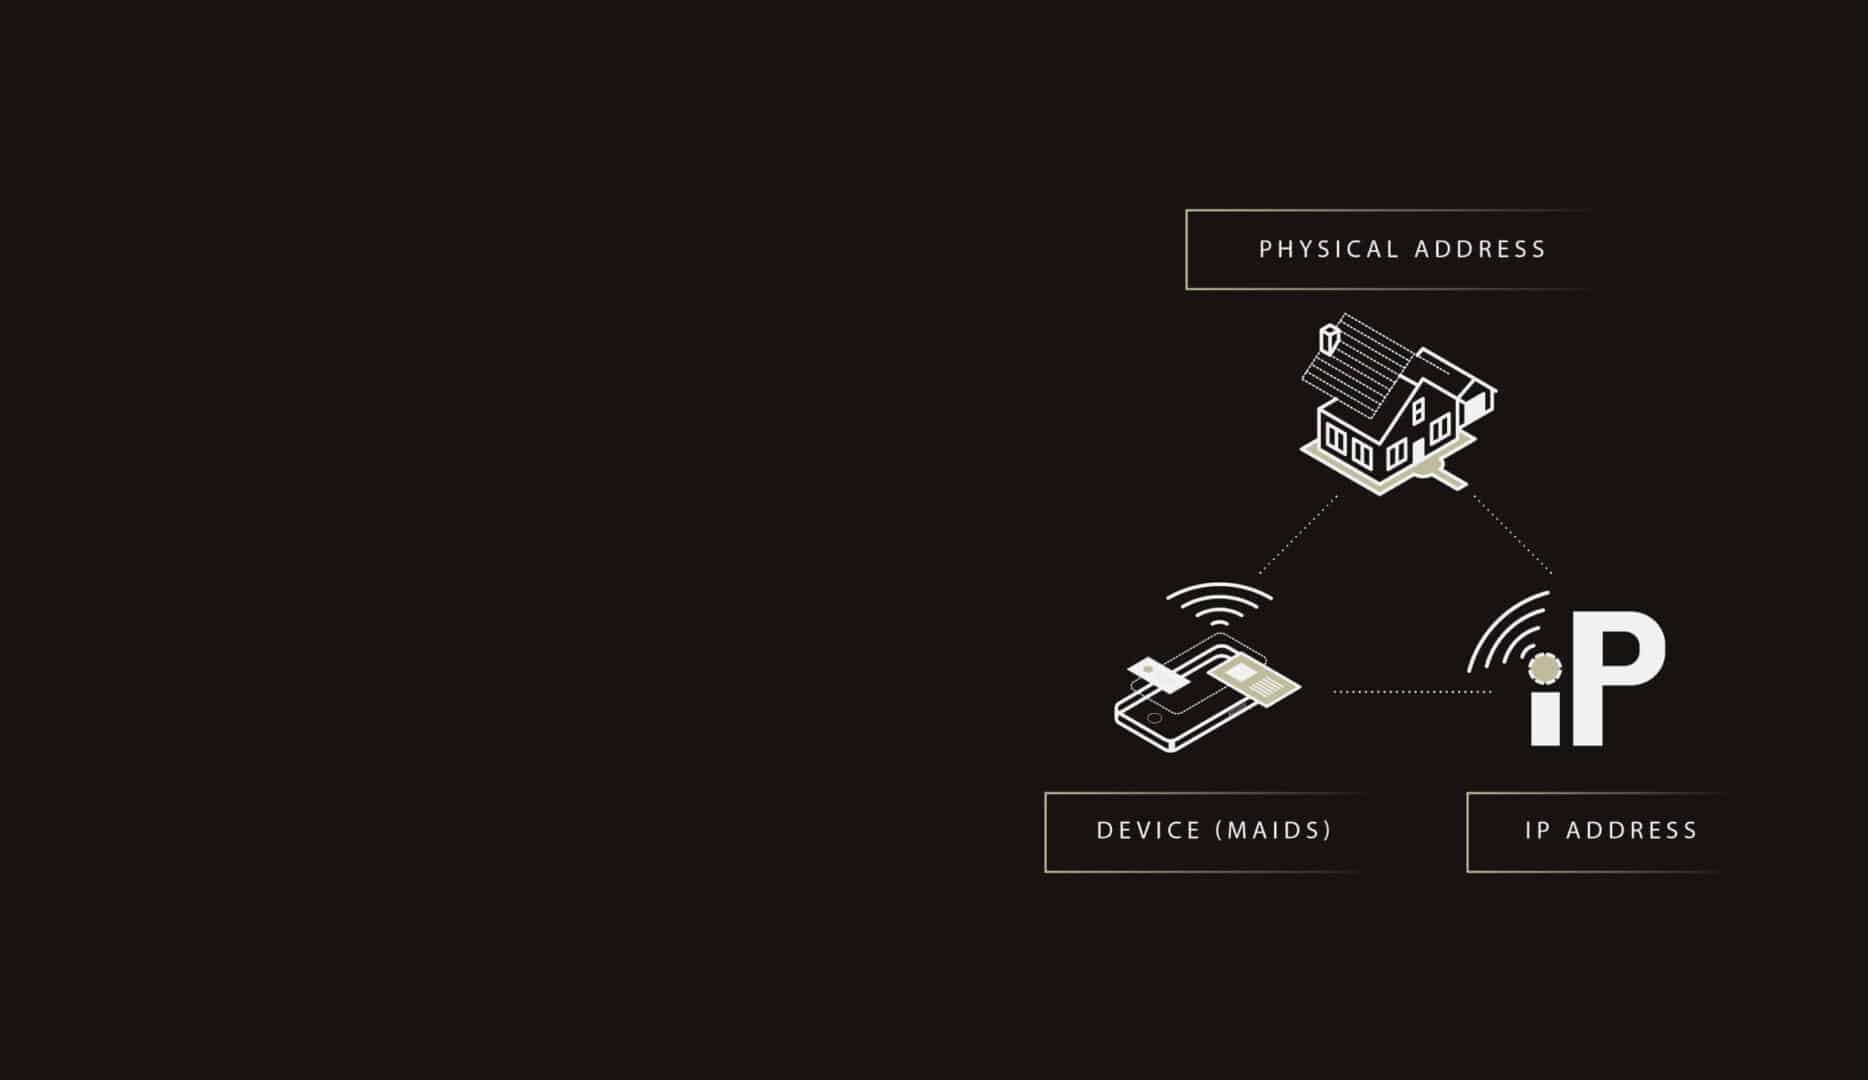
Our Digital Trinity
Our patented process matches mobile advertising IDs (MAIDs) to the physical address through the IP address. This Digital Trinity methodology for audience identification provides extreme precision allowing us to bypass all the cookie-based fraud and serve ads directly to the devices in that household - within 24 hrs.
We Don’t Follow Standards.
We Define Them.
At El Toro, we look at the world differently. We are the leader in observing and understanding human behavior. Our customers gain a competitive advantage from our advanced analytics and ad tech, delivering empirical results that matter.
Target prospects and customers based on location signals, home or office addresses, recent moves, and numerous other categories with digital and print messaging.